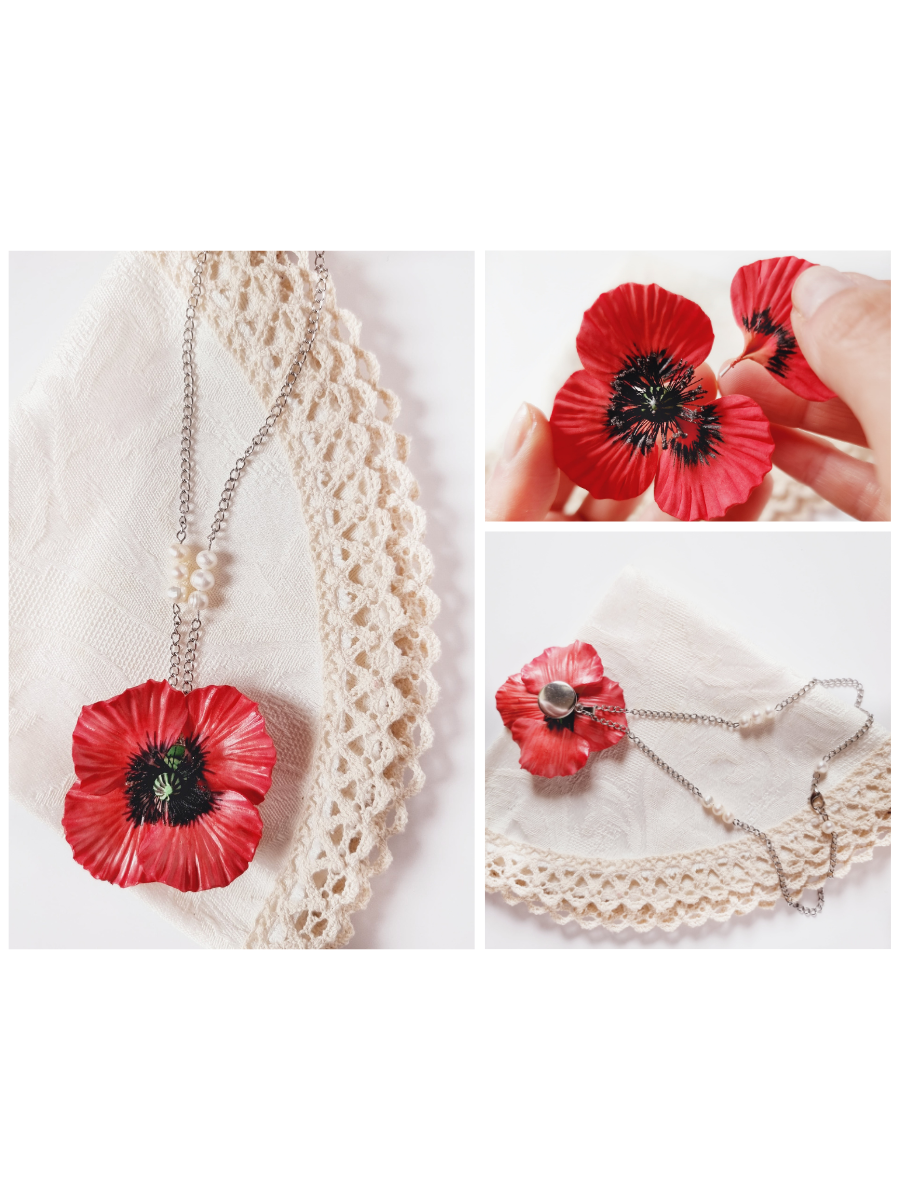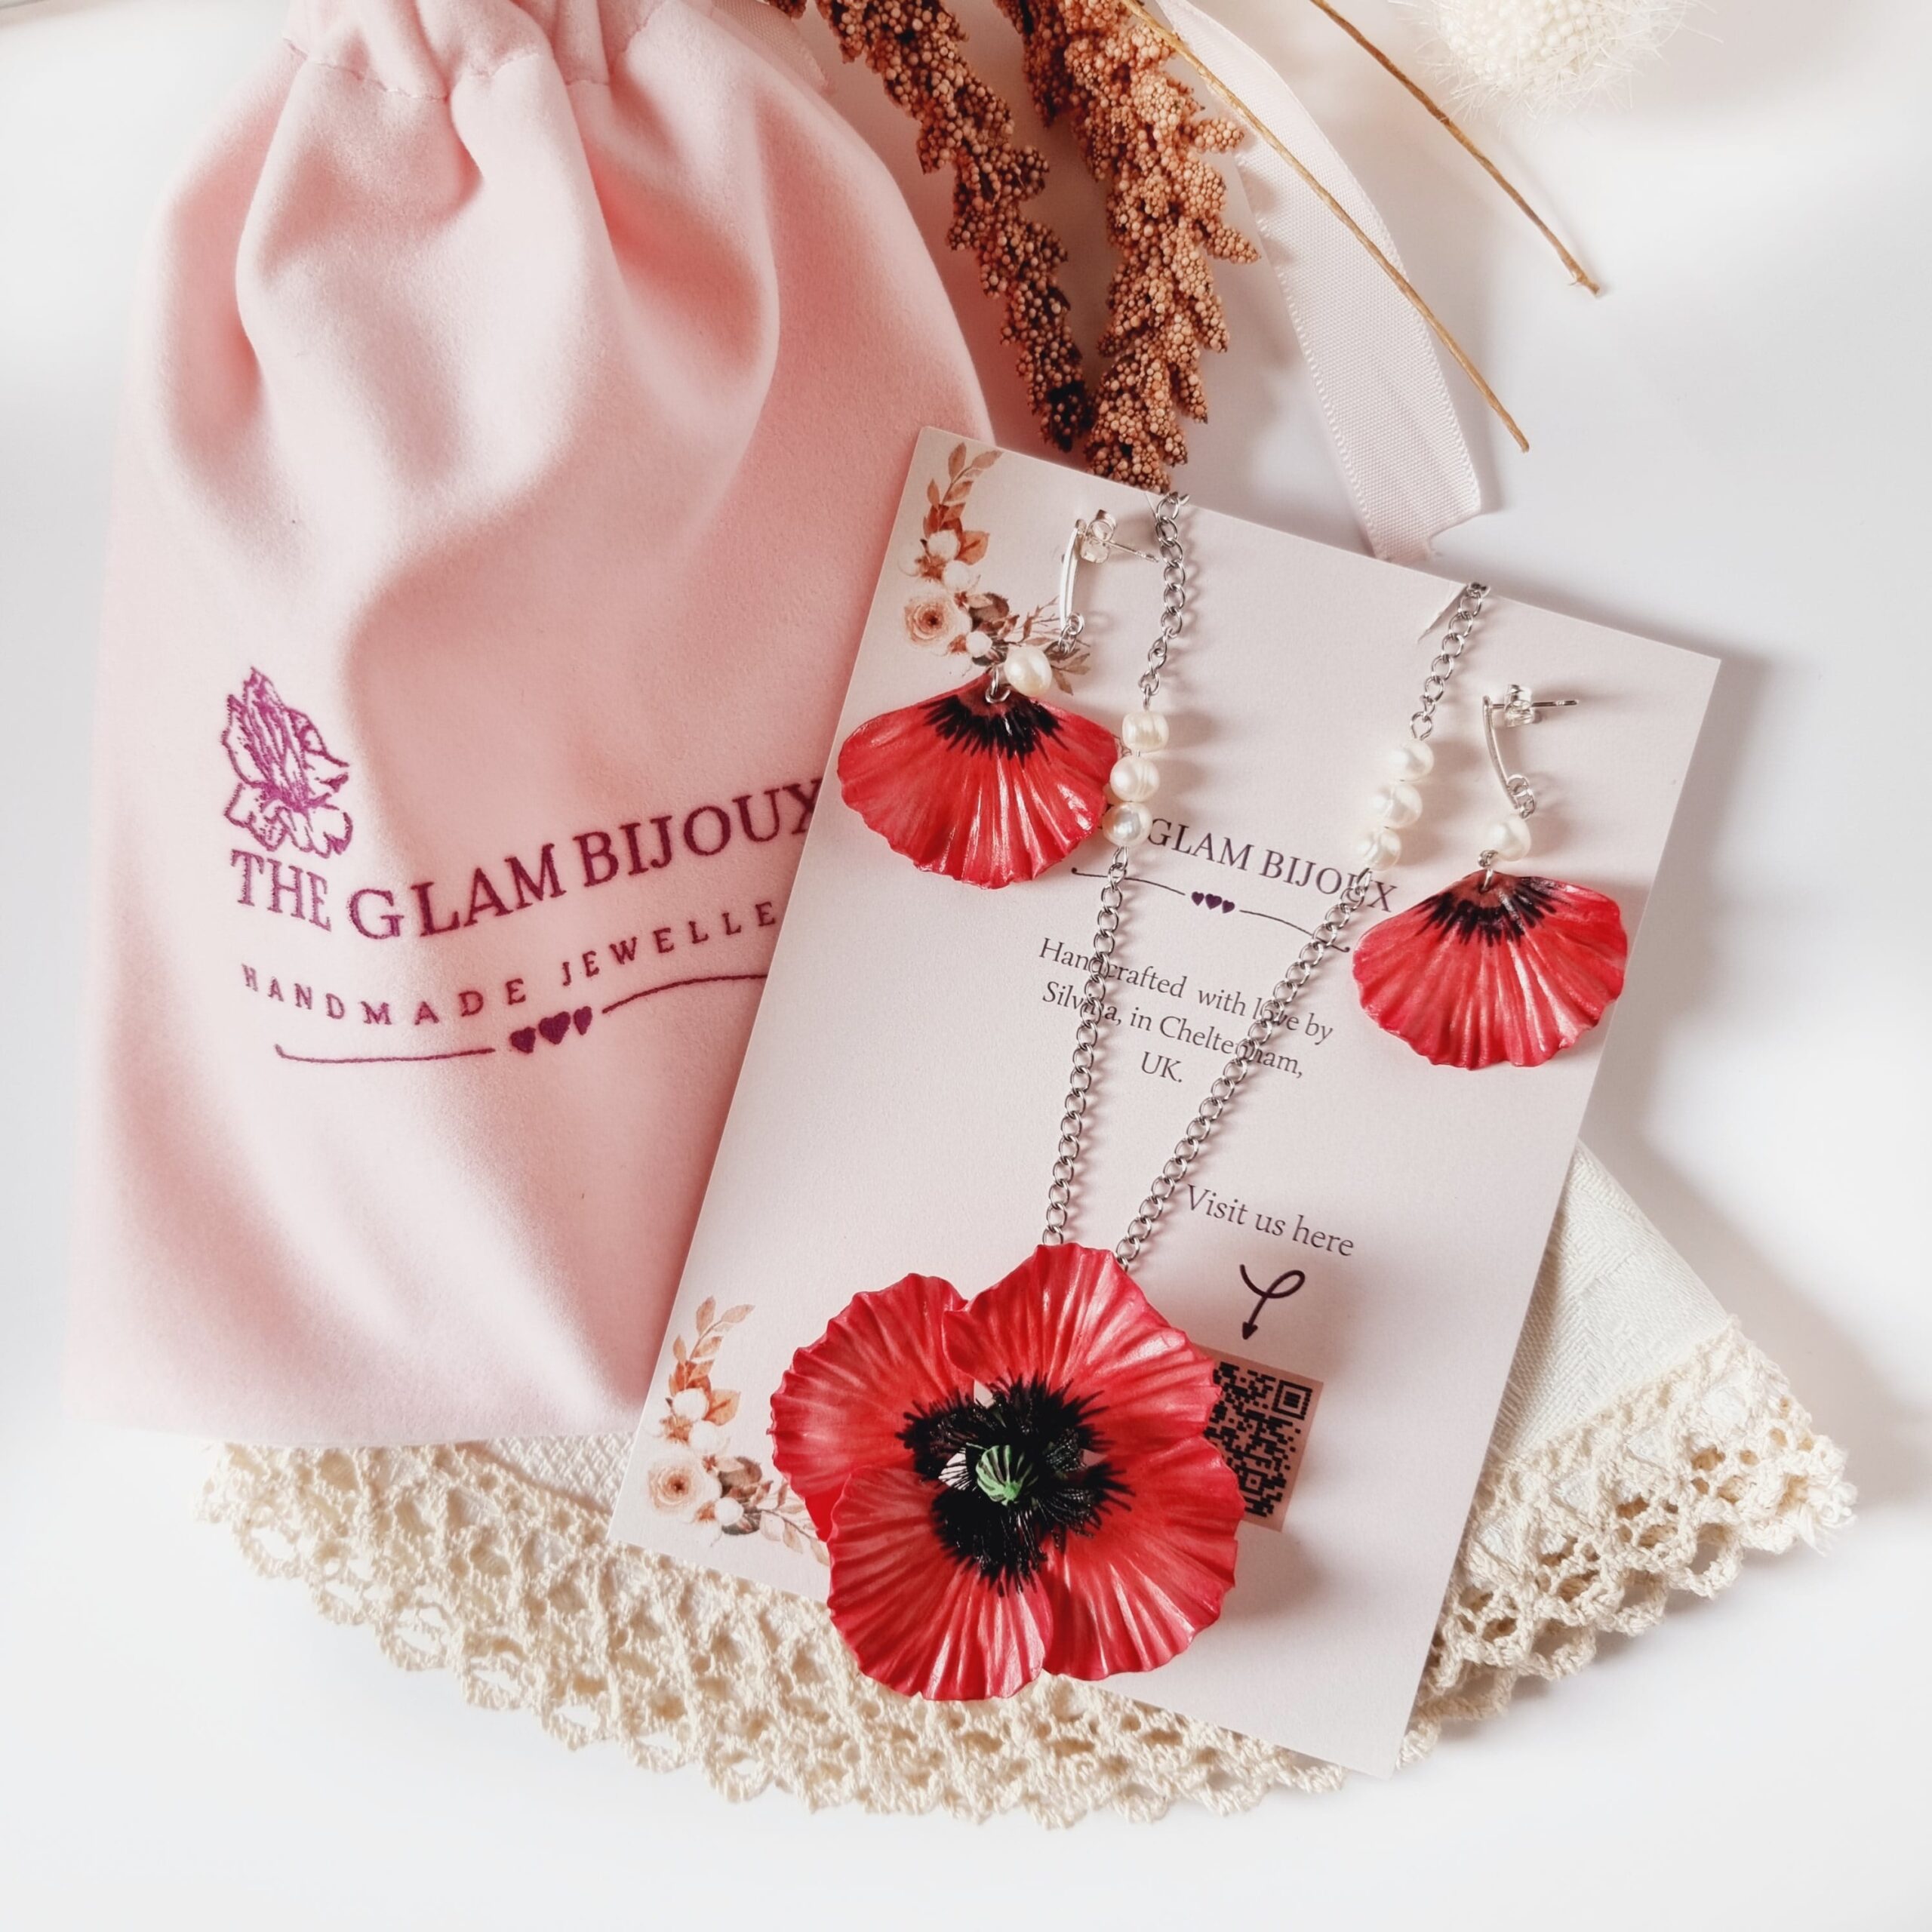
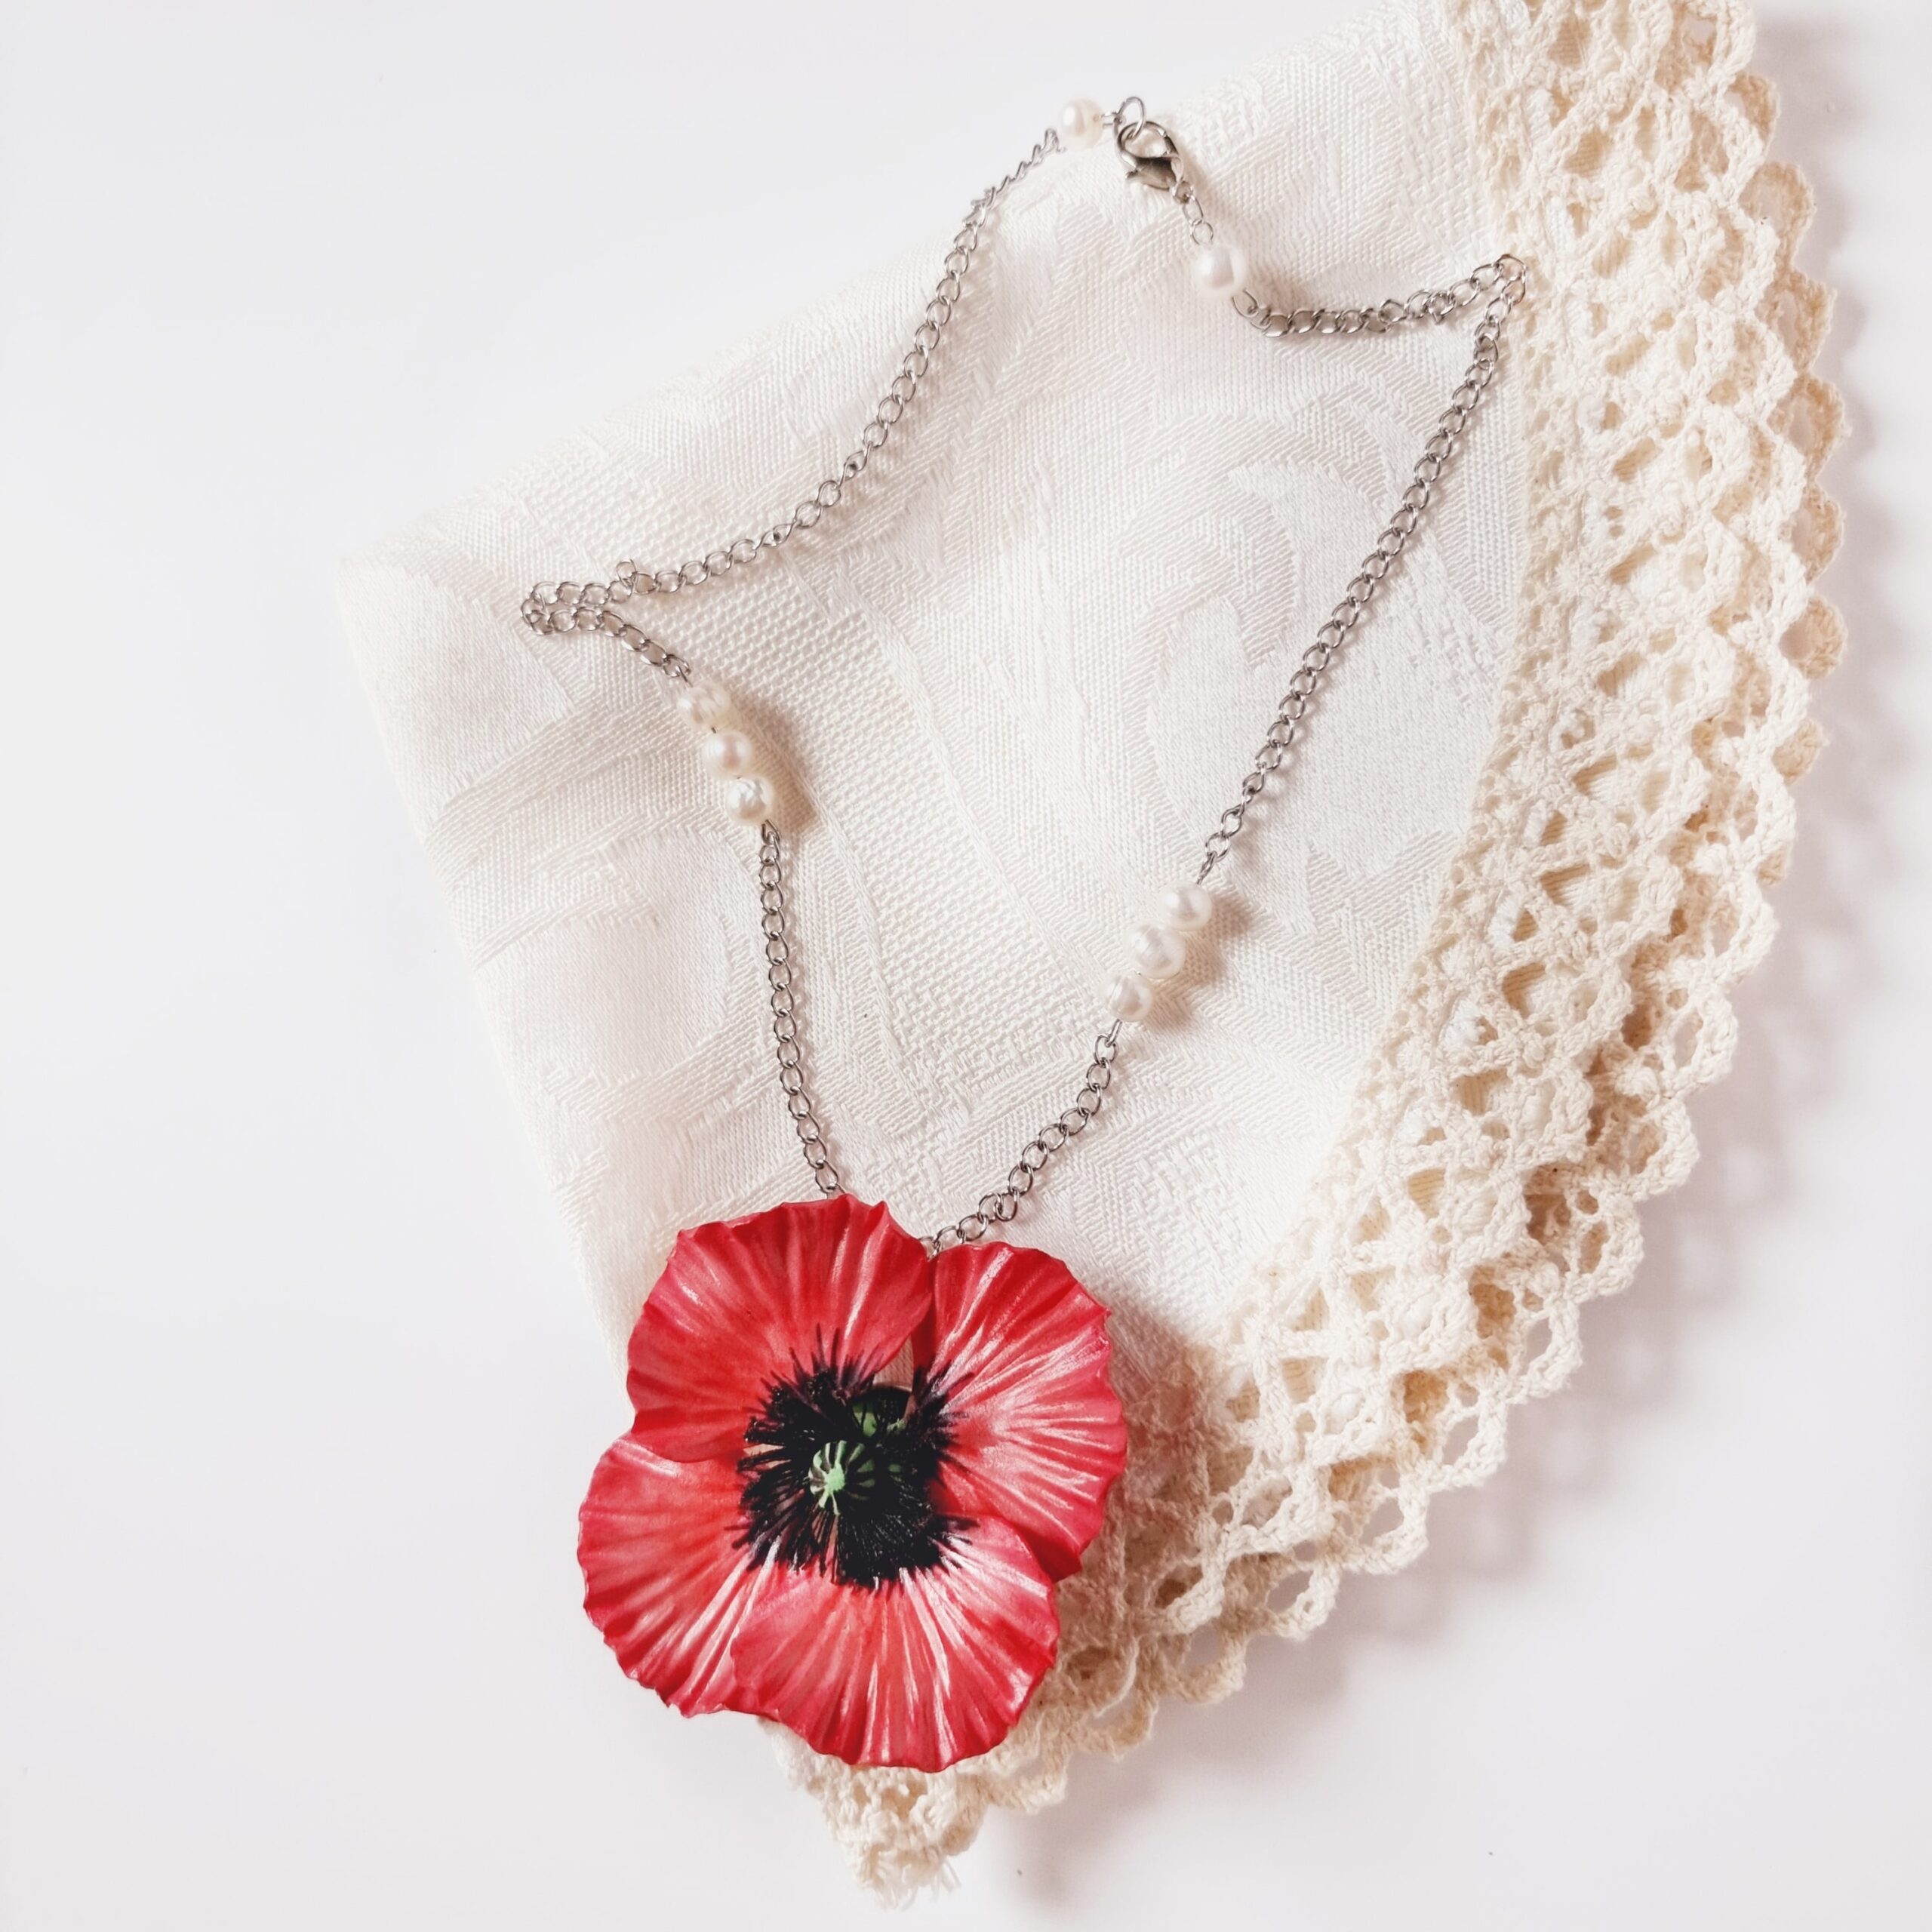
How to make a Clay Poppy necklace
Crafting Nature’s Beauty: A Step-by-Step Guide to Making a Poppy Necklace with Air Dry Clay.

Writting by Silvina Martinez
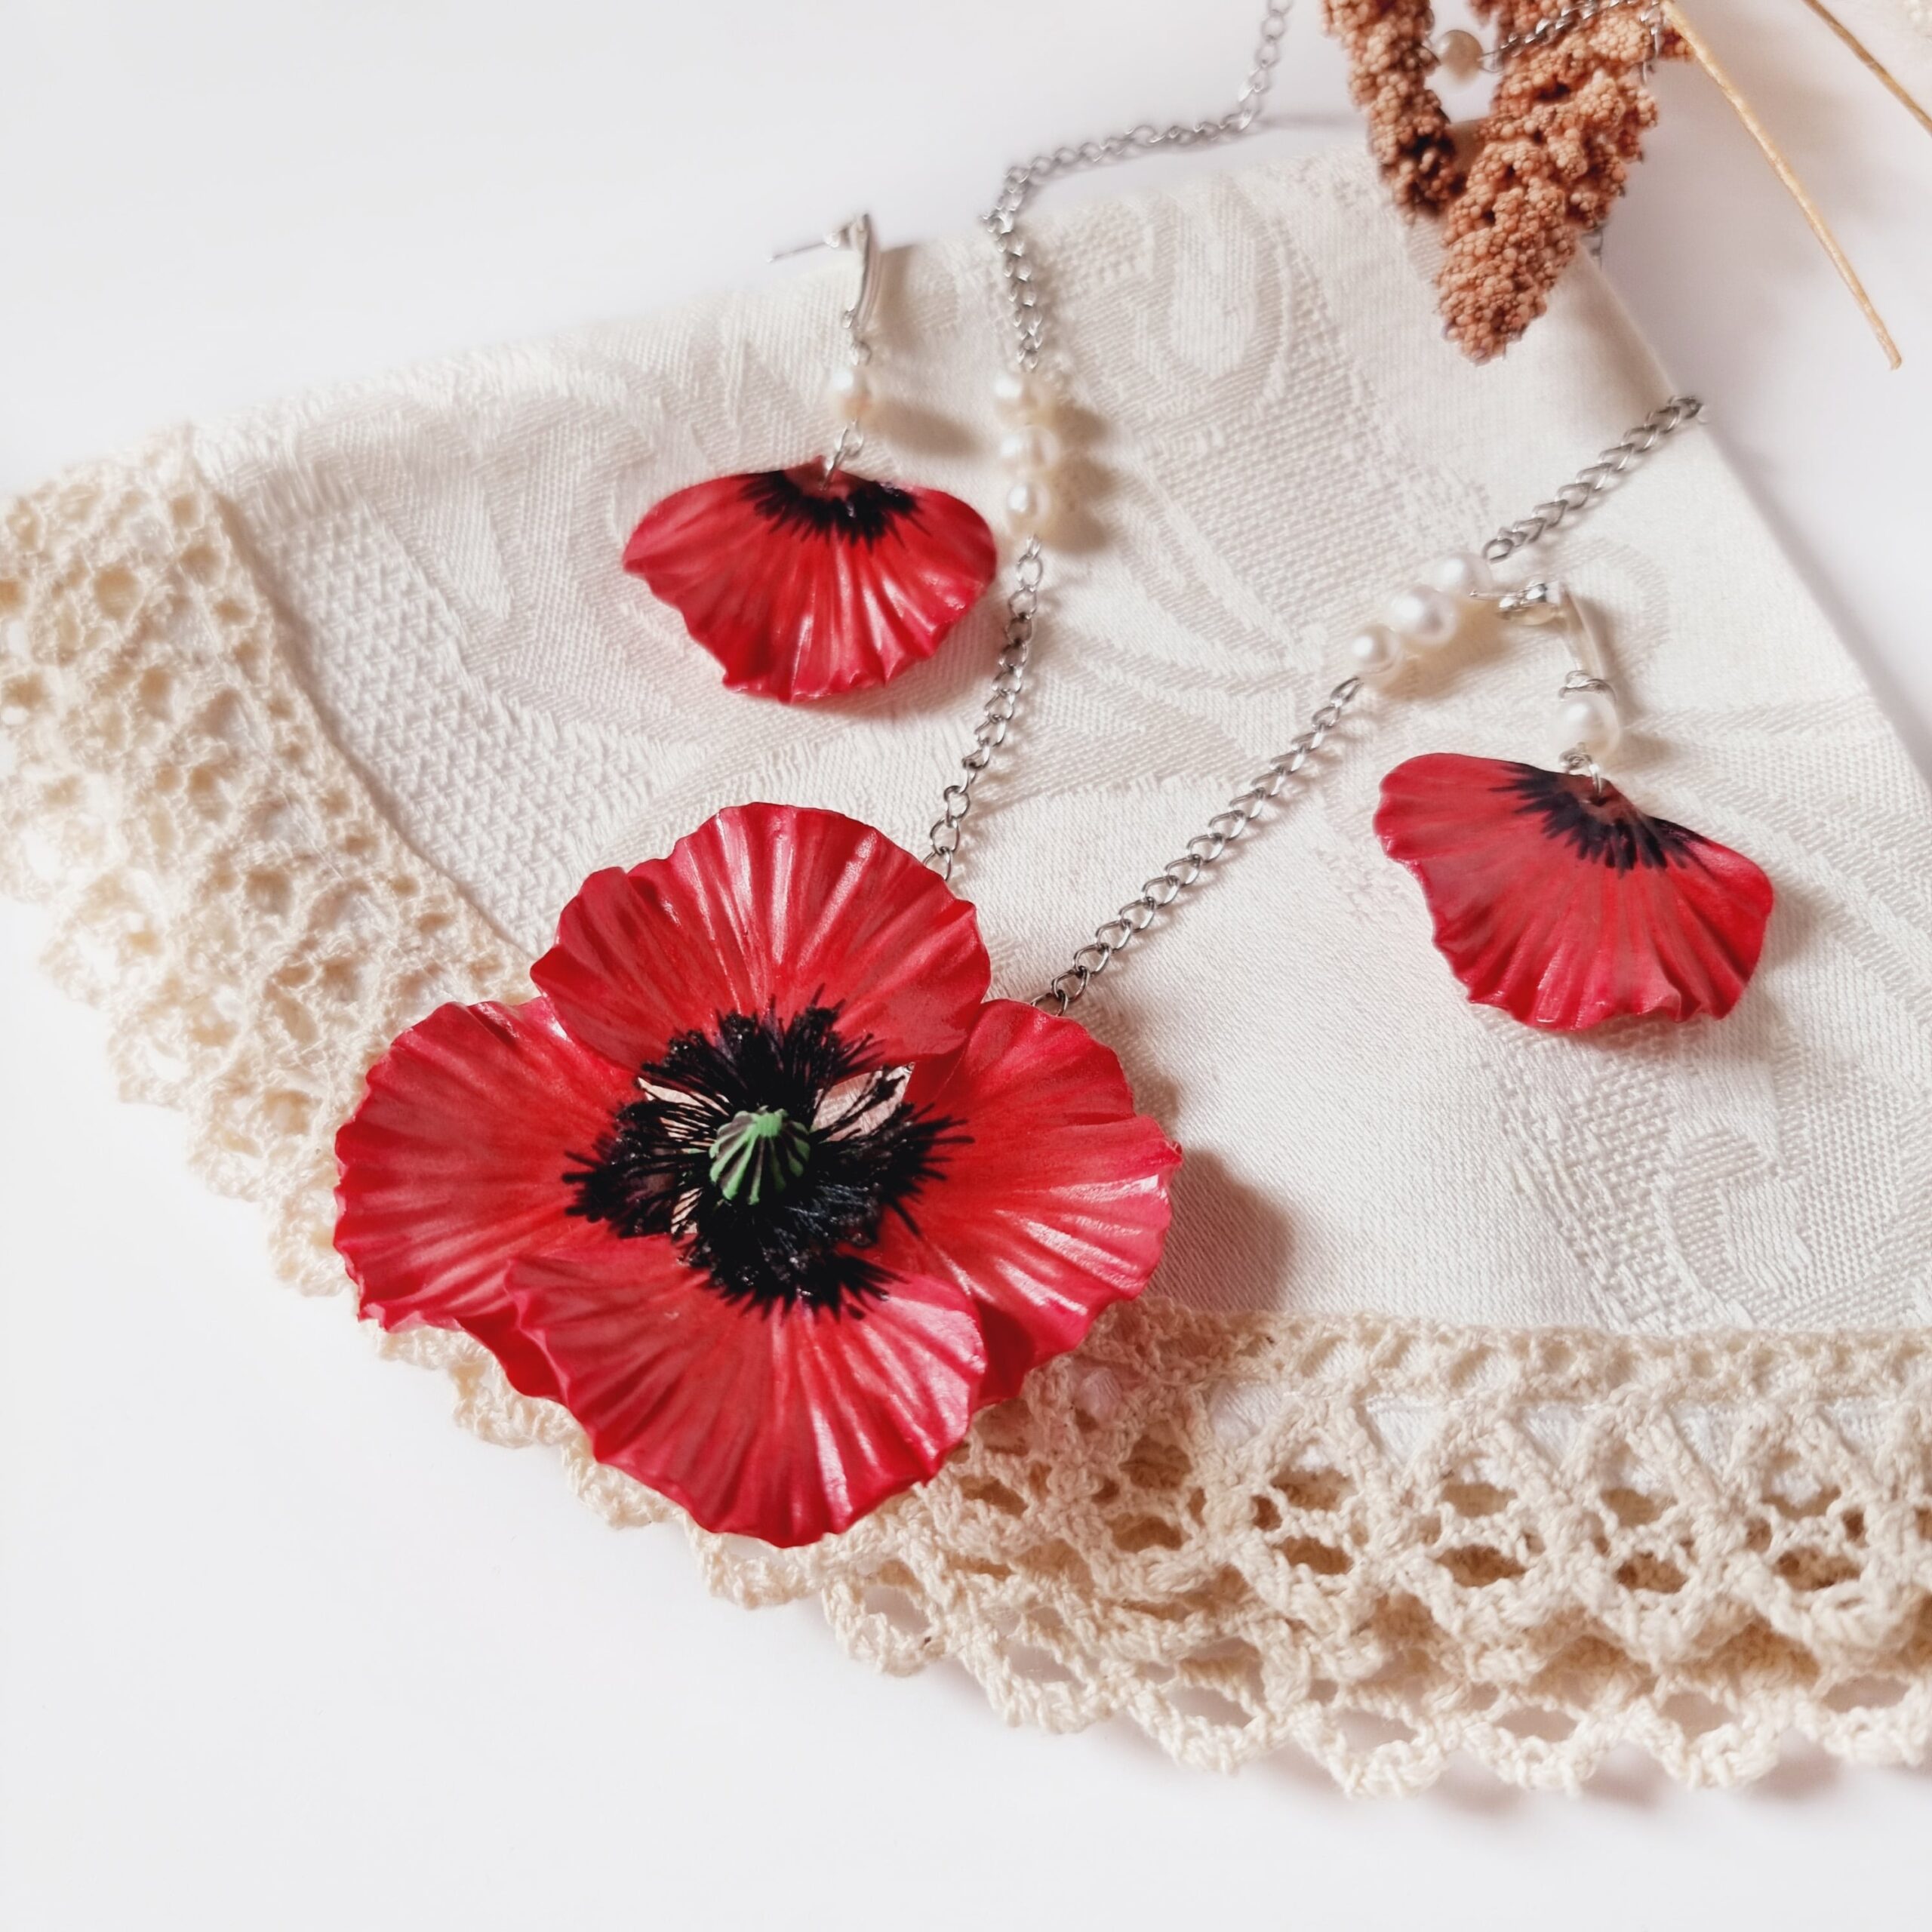
Welcome to a world where art and nature intertwine, where your creativity blooms just like a vibrant poppy in the meadow. In this enchanting tutorial, we will take you on a journey to craft your very own poppy necklace using the versatile medium of air-dry clay.
Picture yourself gracefully shaping each petal, infusing life into the delicate bloom, and wearing your masterpiece with pride. Whether you’re an experienced crafter or just starting on your artistic voyage, this guide promises to unlock your inner artist and leave you with a unique piece of jewelry that’s bound to turn heads.
But that’s not all; our step-by-step instructions will ensure your crafting journey is smooth, enjoyable, and successful. And by the end of it, you’ll not only possess a stunning poppy necklace but also a newfound skill that will leave you yearning for more creative endeavors.
Join us as we dive into this delightful journey of creation, self-expression, and the timeless beauty of poppies. Let’s get started and craft a piece of nature’s elegance that you’ll cherish forever.
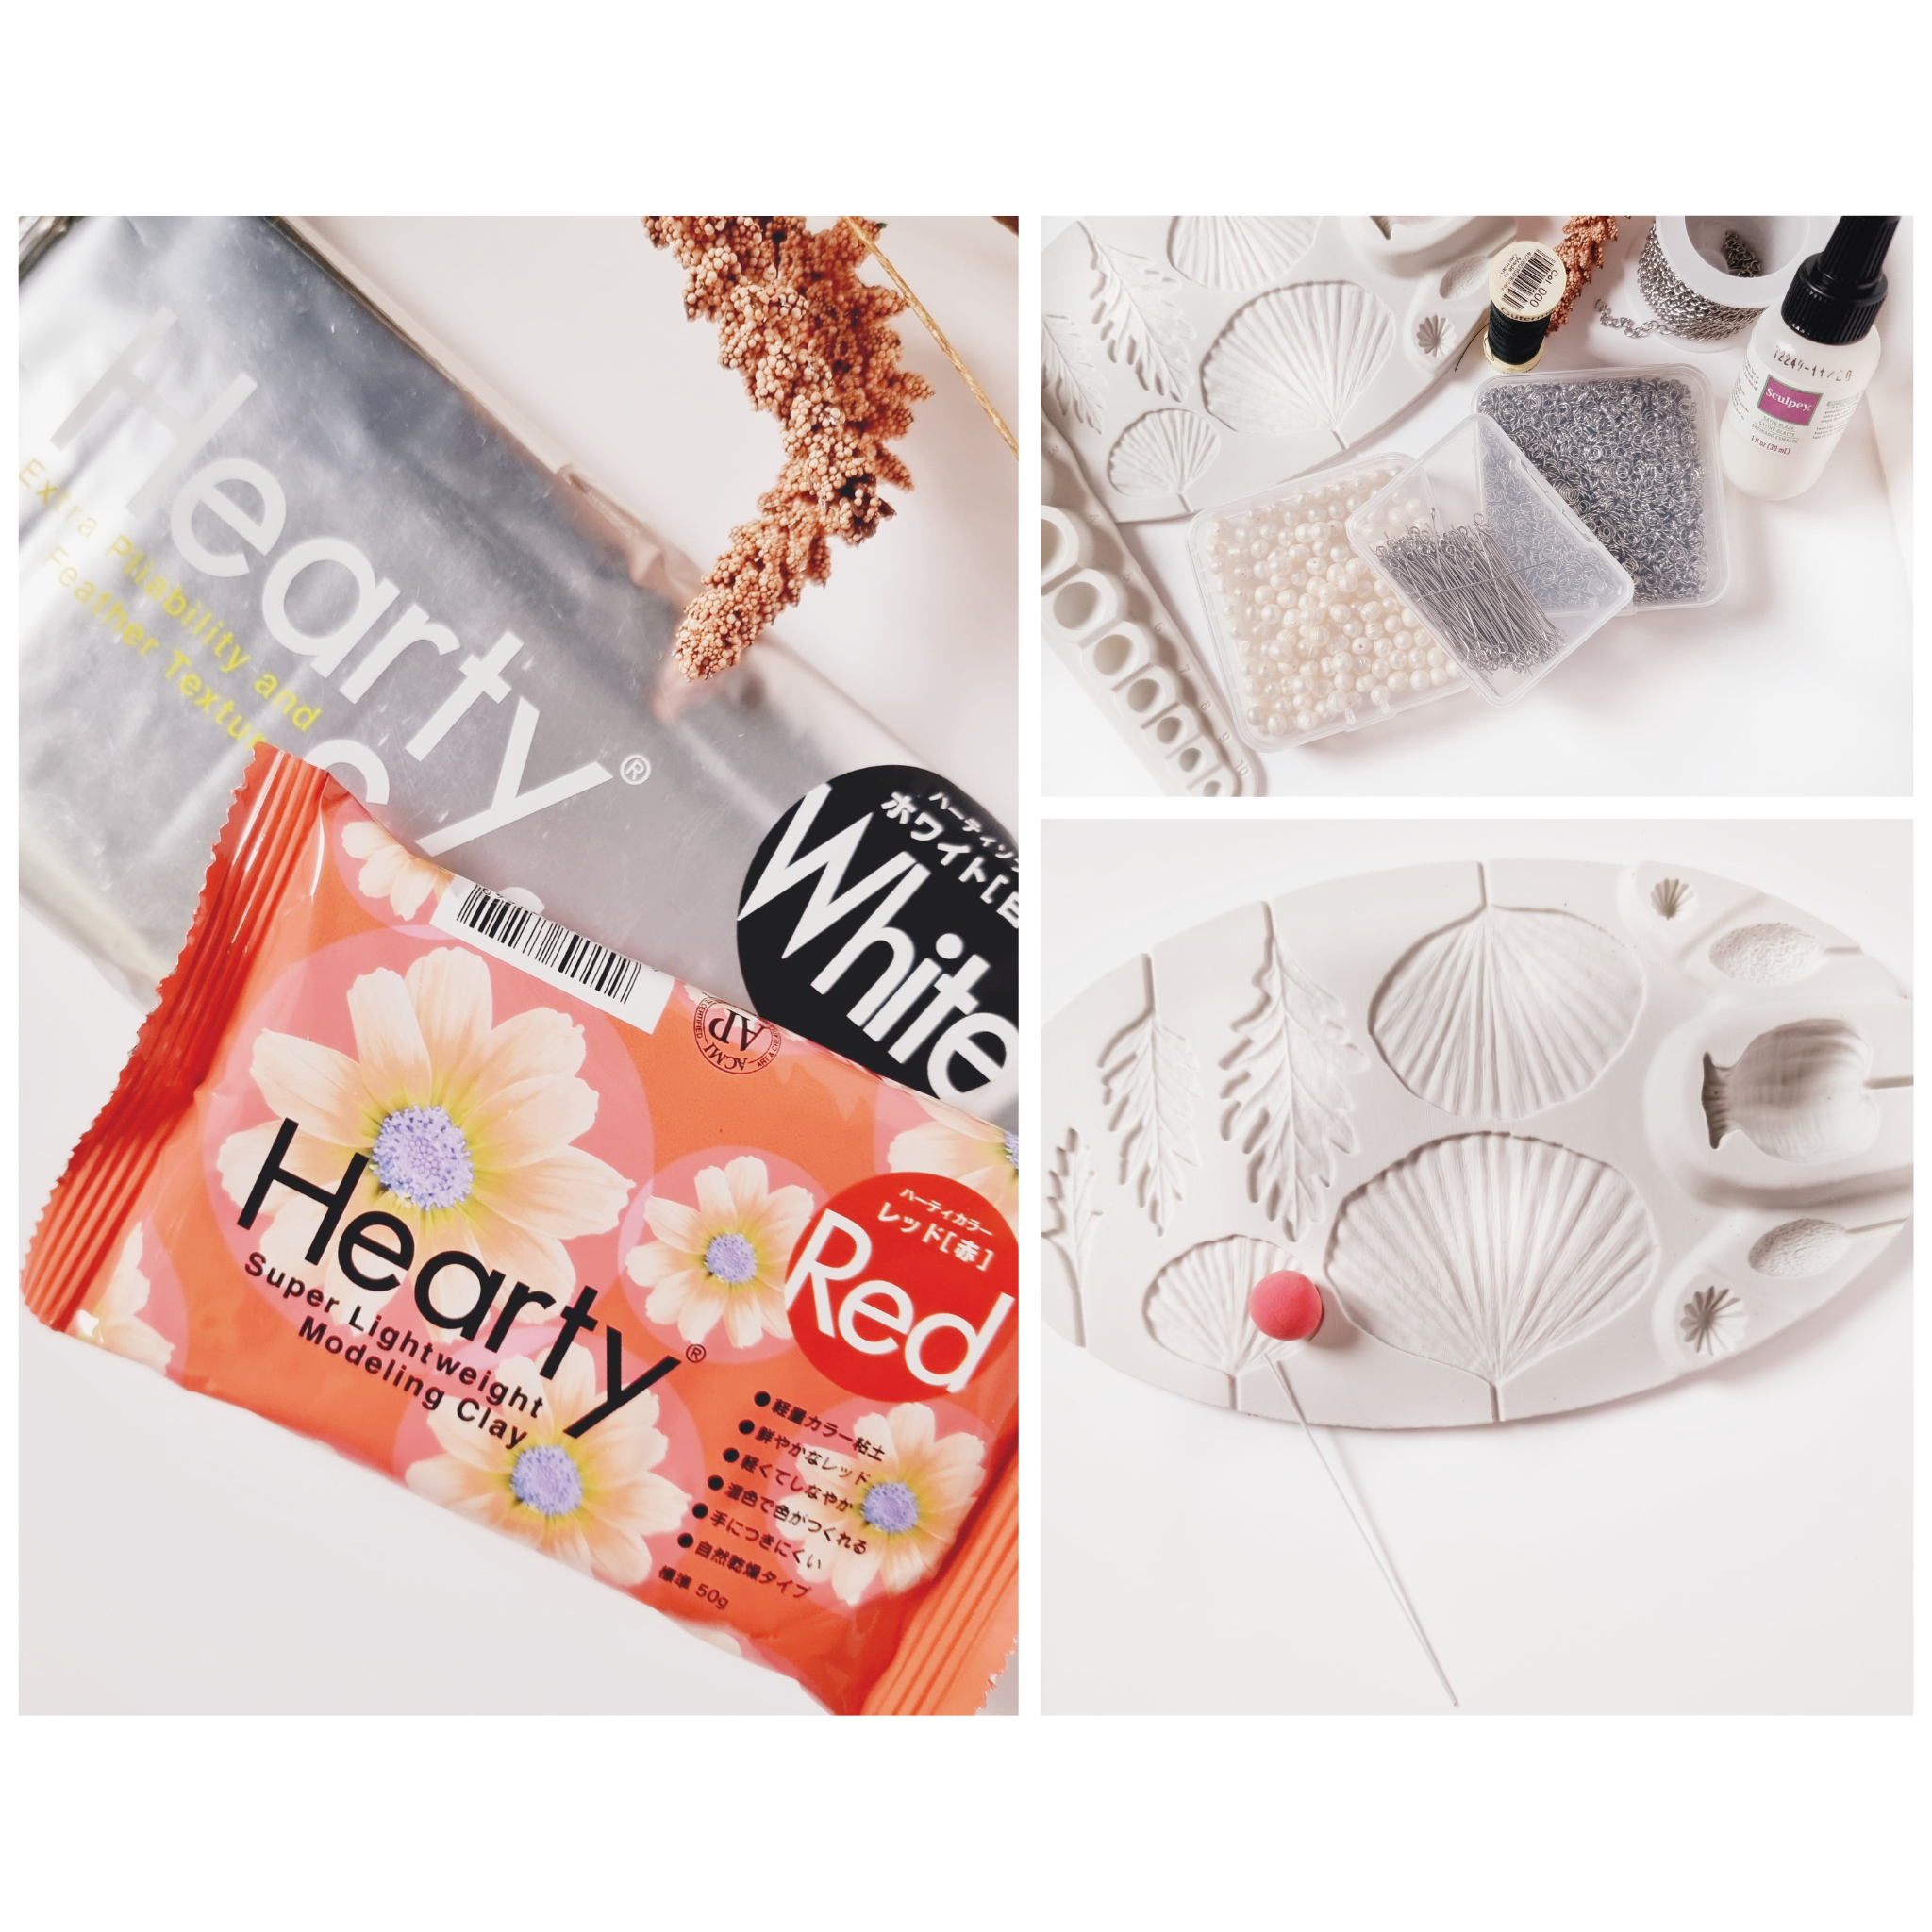
Step 1: Gather Your Materials Before we dive into crafting this exquisite poppy necklace, let's ensure you have everything you need:
- Hearty Clay: You’ll require vibrant red, white, and green Hearty Clay for the poppy petals, the center, and the leaves.
- Poppy Mold: Make sure you have a poppy-shaped mold to create realistic petal shapes.
- Hypoallergenic Steel Chain: Your chain, both stylish and gentle on the skin.
- Pearls: Small, round pearls to add elegance to your necklace.
- Chain Clasps: These will secure your necklace elegantly.
- Poinsettia Red Powder Color: For that lifelike poppy hue.
- 24-Gauge Wire: This will help you shape your poppy petals.
- Green Flower Tape: To craft and cover the wire with finesse.
- Pliers and Wire Cutters: Essential tools for jewelry making.
- Petal Shaper: To give your petals natural contours.
- Black Colored Sand: For that striking poppy center.
- Black Thread: To make the centre of the Poppy.
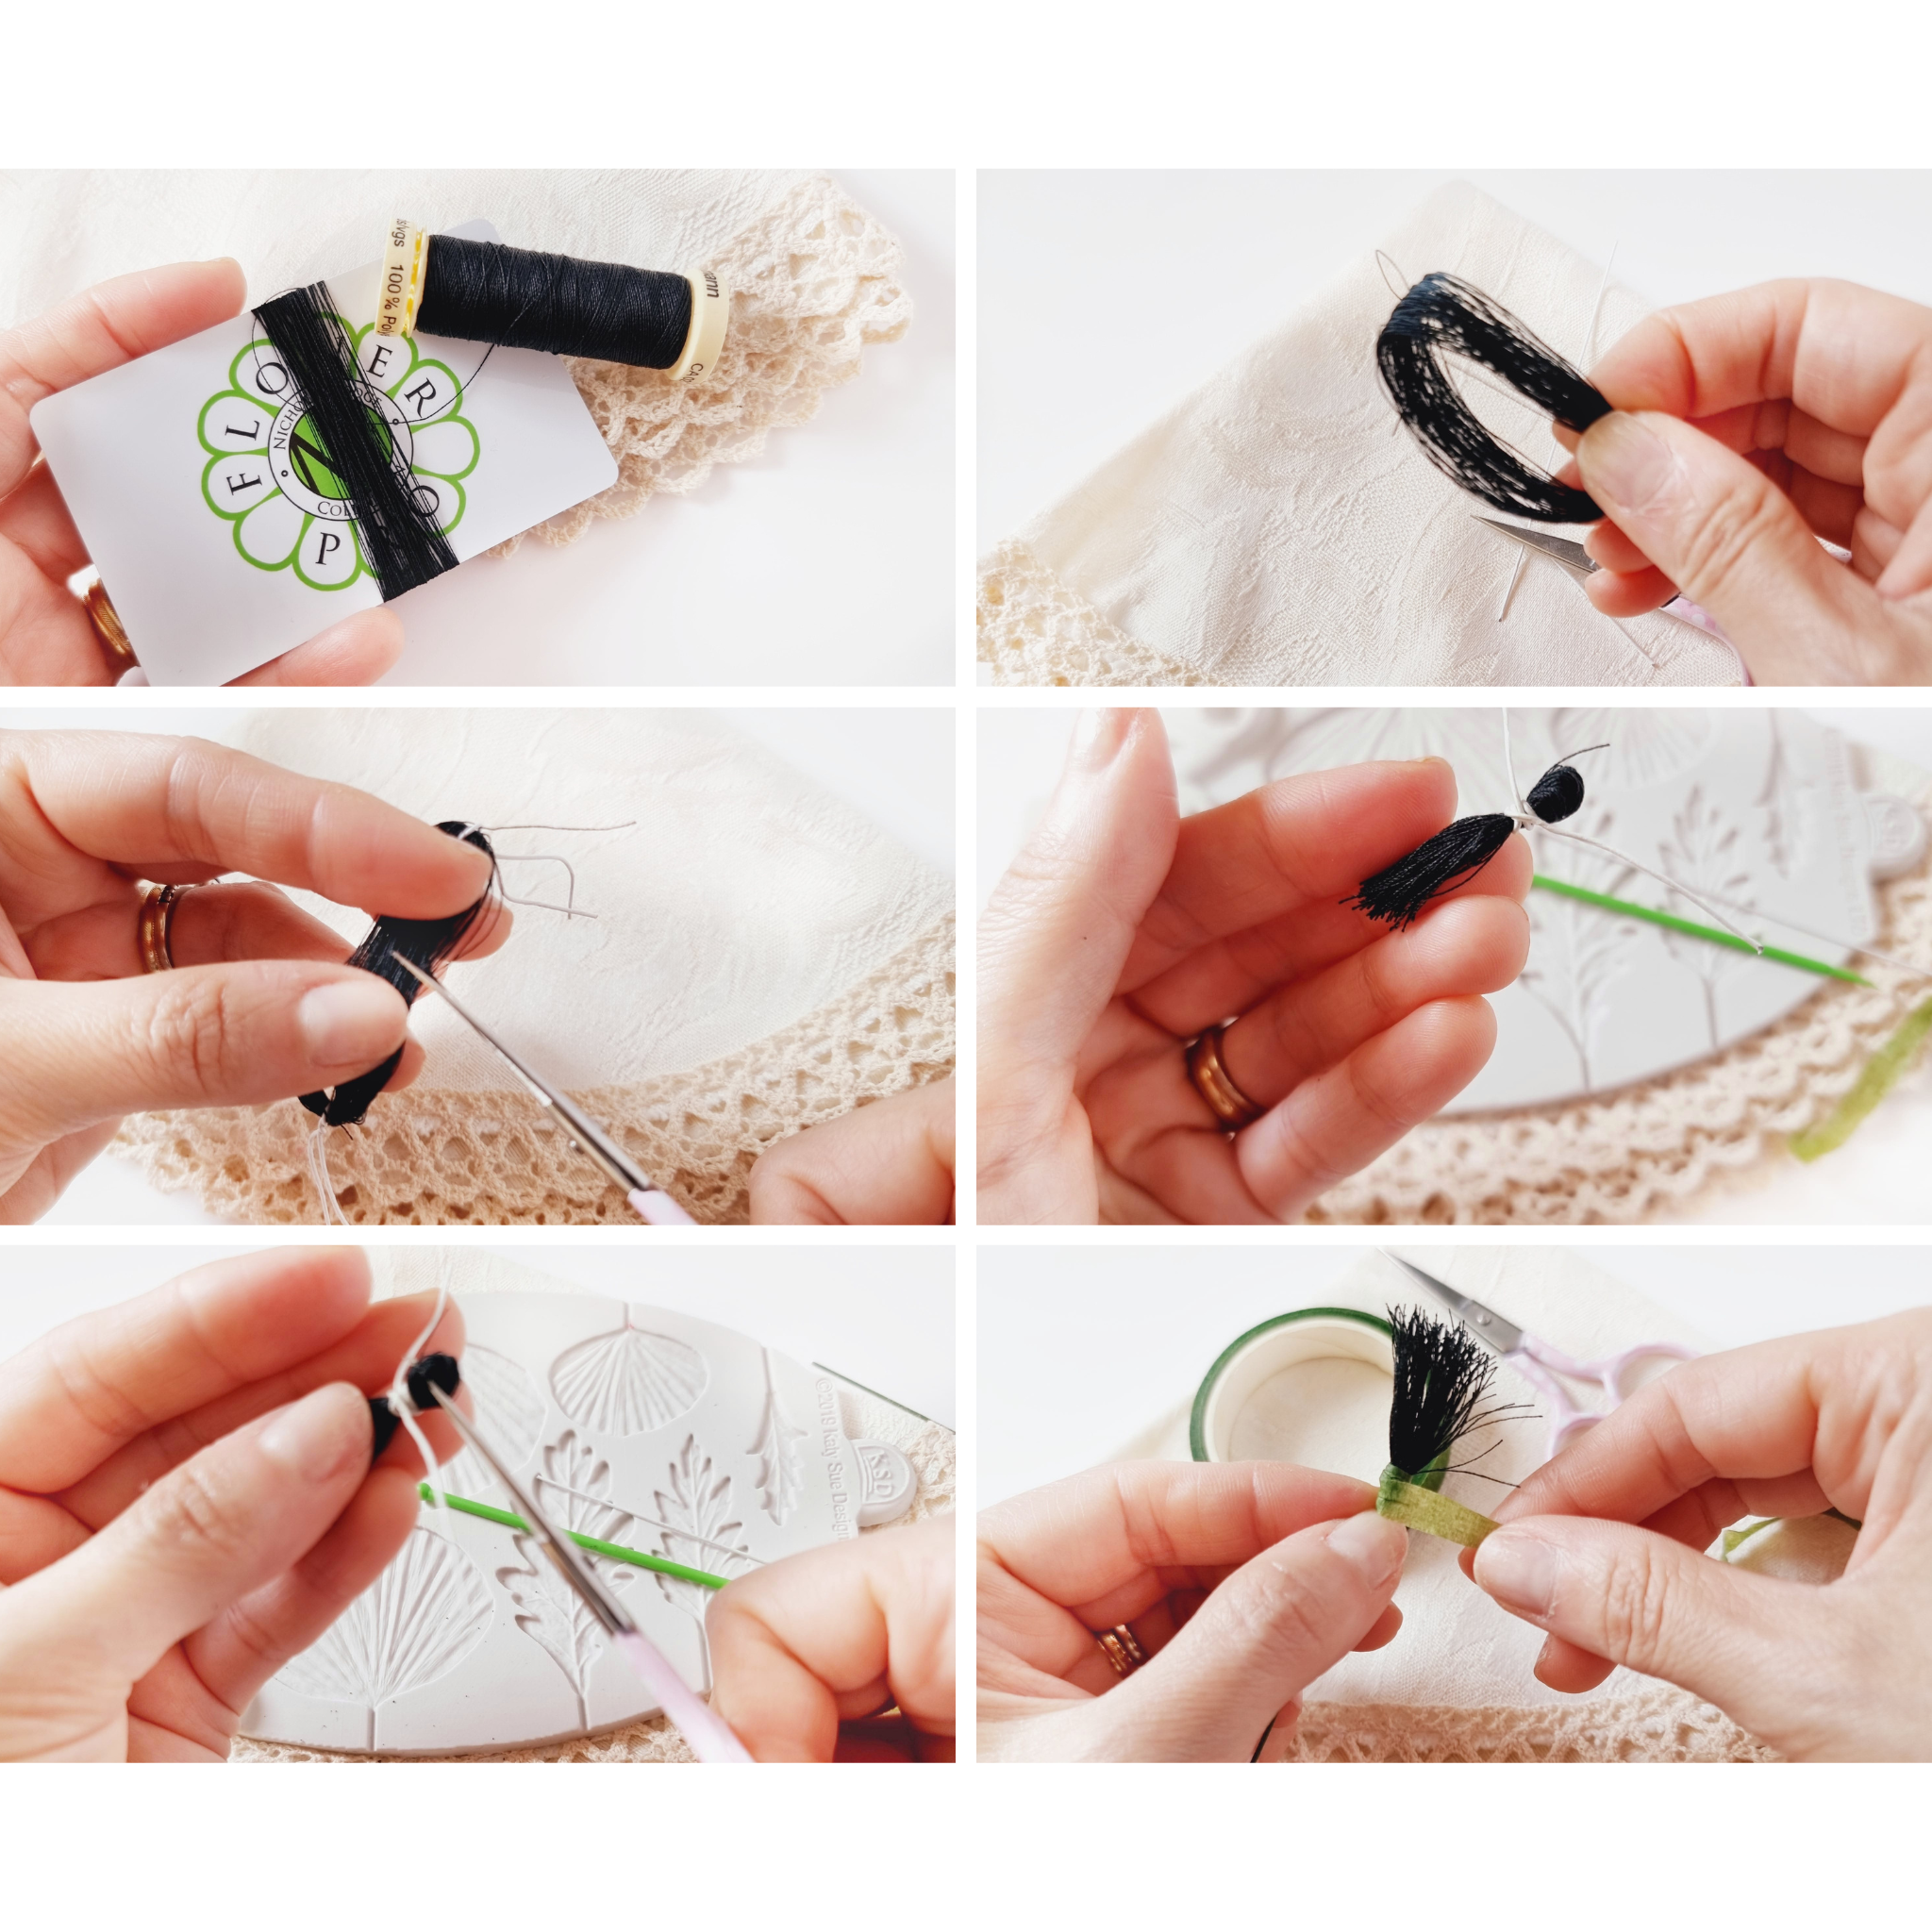
Step 2: Crafting the Poppy Center Now, let's create the captivating heart of your poppy necklace, the center. Follow these steps with care:
1. Wind the Black Thread: Begin by wrapping your black thread around a scraper or a plastic card around 80 times. This creates a dense, dark core for your poppy.
2. Secure the Thread: Gently remove the wound thread from the scraper, leaving a short length exposed. Using 24-gauge floral wire, wrap the ends of the thread, leaving a small portion extending. Snip off the excess wire.
3. Trim to Size: With scissors, carefully cut the wound thread to achieve a total length of 10mm.
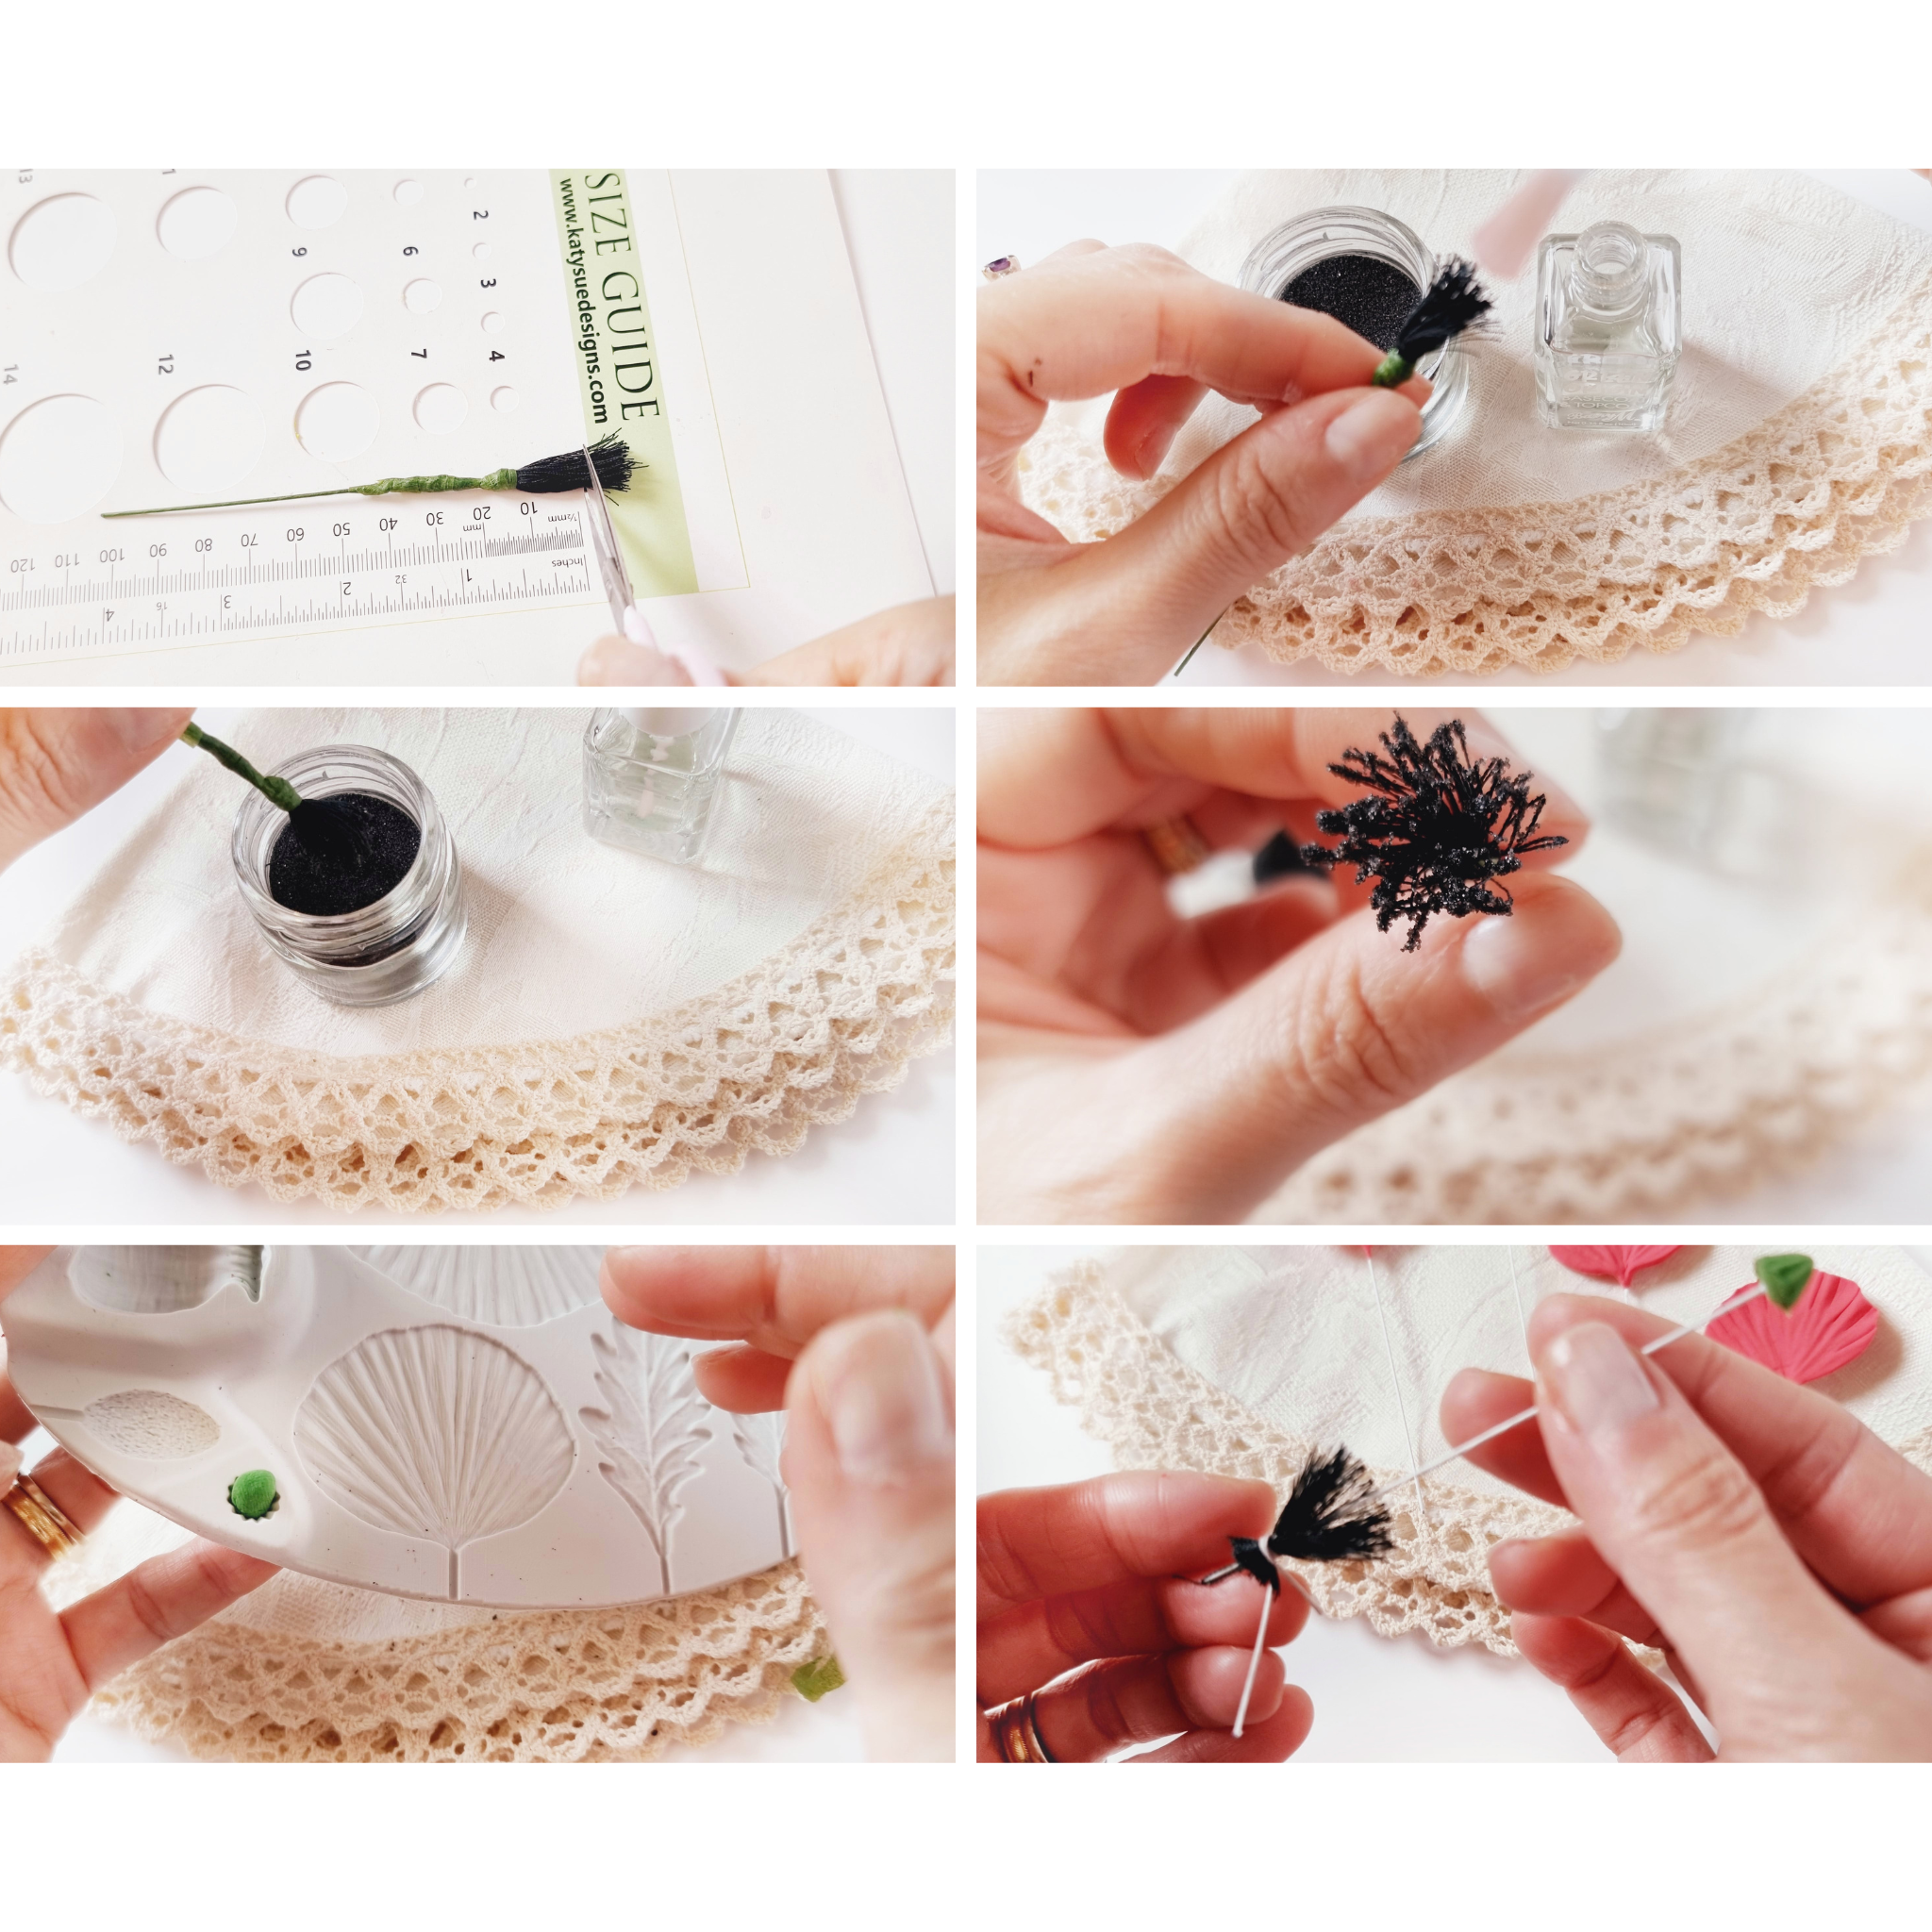
4. Add Green Coverage: Wrap green floral tape around the base of the thread, ensuring its snug and secure. This will both cover the wire and hold it firmly in place.
5. Create the Green Center: Take your green Hearty Clay and use the smallest cavity in your poppy mold. Insert a piece of wire into the cavity with a touch of PVA white glue. Press the clay into the cavity, and gently remove it from the mold.
6. Assemble the Center: Place the green center, created in the previous step, into the middle of the black thread core. Apply a dab of transparent nail lacquer to the thread ends, then dip them into black sand to add texture. Separate the threads to ensure they are evenly spaced around the green center.
With these steps completed, you’ve crafted a stunningly realistic poppy center. This will serve as the heart of your poppy necklace, adding depth and elegance to your final piece.
Stay tuned as we move on to shaping the delicate petals in the next step of our creative journey!
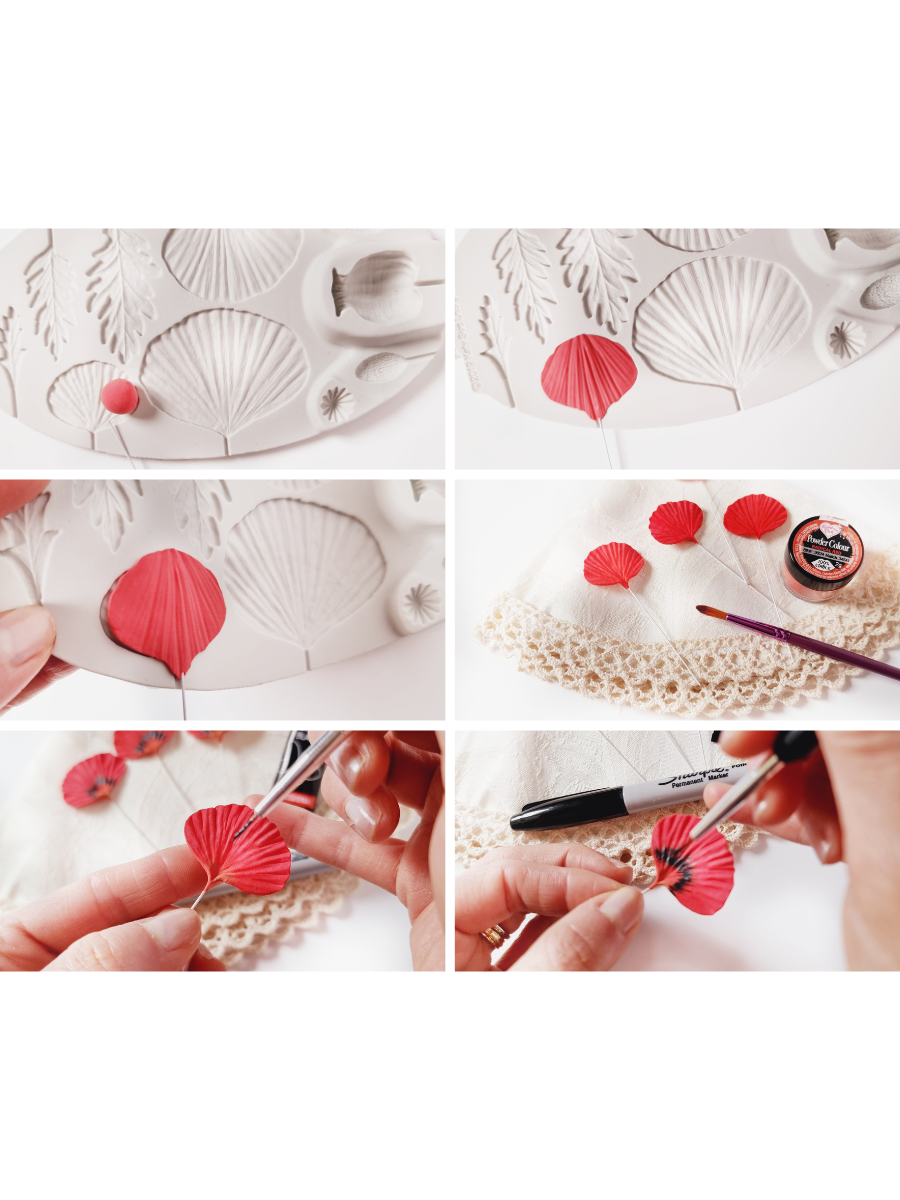
Step 3: Crafting the Poppy Petals:
Creating lifelike poppy petals is a key part of our journey towards a stunning necklace. Follow these detailed steps carefully:
1. Prep the Clay: Begin by placing red Hearty Clay into the smallest petal cavity of your poppy mold. Gently press it down with your fingers or a cosmetic sponge until the cavity is completely filled, ensuring there’s no clay spilling over the edges of the mold.
2. Texture the Petal: Use a fan veiner tool to add lifelike texture to your petal while it’s still in the mold. This step adds realism to your creation.
3. Insert Floral Wire: Place a piece of 24-gauge floral wire in the center of the petal, using a small amount of PVC white glue to secure it in place. Carefully remove the petal from the mold.
4. Shape and Dry: With your fingers, gently give each petal some movement, ensuring they don’t appear flat. Place the petals in a flower formed to keep their shape as they dry. Let them dry for approximately 3 hours in a dry environment.
5. Add Colour: Once dry, it’s time to bring out the vibrancy of your poppies. Using a fine paintbrush, apply red poinsettia powder color to each petal.
6. Seal with Hairspray: To set the color, spray each petal with hairspray from a distance of about 10cm. This helps the colour adhere and keep its vibrancy.
7. Add Veins and Details: Using a black permanent marker, create gentle, short lines on each petal, starting from the outer edge and moving inward. Leave a small space at the tip of each petal for the green detail. Allow this to dry for approximately 20 minutes.
With these meticulous steps, you’ve successfully crafted lifelike poppy petals that will be the crowning glory of your necklace. Your patience and attention to detail will certainly pay off in the result.
Stay tuned for the next steps, where we’ll assemble your exquisite poppy necklace!
Step 4: Assembling the Poppy
Now, it’s time to bring your poppy to life by carefully assembling its petals. Follow these steps with precision:
1. Trim and Shape Petal Wires: Begin by cutting each petal’s wire to approximately 10mm in length. Use pliers to bend the wires from the tip towards the outer edge of each petal.
2. Prepare the Centre Wire: Trim the wire in the center of your poppy to the same 10mm length. Apply green Hearty Clay around this central wire, ensuring a secure bond.
3. Attach the Petals: With a touch of PVA white glue on the tip of each wire, insert the petals one by one. Start with one petal, then place another directly opposite it. Finally, position the remaining two petals in between the first two. This arrangement will create a balanced and realistic poppy.
4. Let it Dry: Allow the assembled poppy to dry thoroughly. This will ensure the petals and center adhere securely to the wires.
5. Choose Your Necklace Option: Now, you have the creative freedom to choose how to display your beautiful poppy. You can attach it to a metal base and add a chain, a cord, or even a ribbon—whichever suits your personal style and preferences. Each option will enhance the charm of your necklace.
By following these steps, you’ve successfully assembled your poppy, transforming it into a stunning pendant that’s ready to grace your chosen necklace base.
Now, your one-of-a-kind poppy necklace is ready to be showcased and worn with pride. The options are endless, but the result will always be a masterpiece of nature-inspired artistry.
Stay tuned for the final touches that will complete your poppy necklace!